Carpet is a big step! Once we have all the flooring down we feel like we can finally start moving some stuff over! We chose the this carpet made of 50% recycled bottles to get some green building credit. It has pinstripes–so fancy. We chose a recycled carpet padding as well–bring on the recycled content credit! We purchased and installed through home depot.
Home Depot install services were pretty straightforward, but we started early on this so not sure how it would work if you were in a rush.
Call and set up a measurement. (This costs $50, but will go towards the final carpet payment if you end up installing with them.)
The guy comes and measures everything (it only took about 30 minutes).
That guy submits his numbers to the Home Depot ordering folks and they email me a quote that expires in a couple days.
It took me another couple weeks to confirm the order (by making a payment) so they had to requote me (luckily the cost stayed the same).
Once I made my payment, they send my info off to their subcontractor carpet installers.
The subcontractors gave me a call to schedule the install. They were able to get an install appointment within 7 days.
Subcontractors came and did the install!
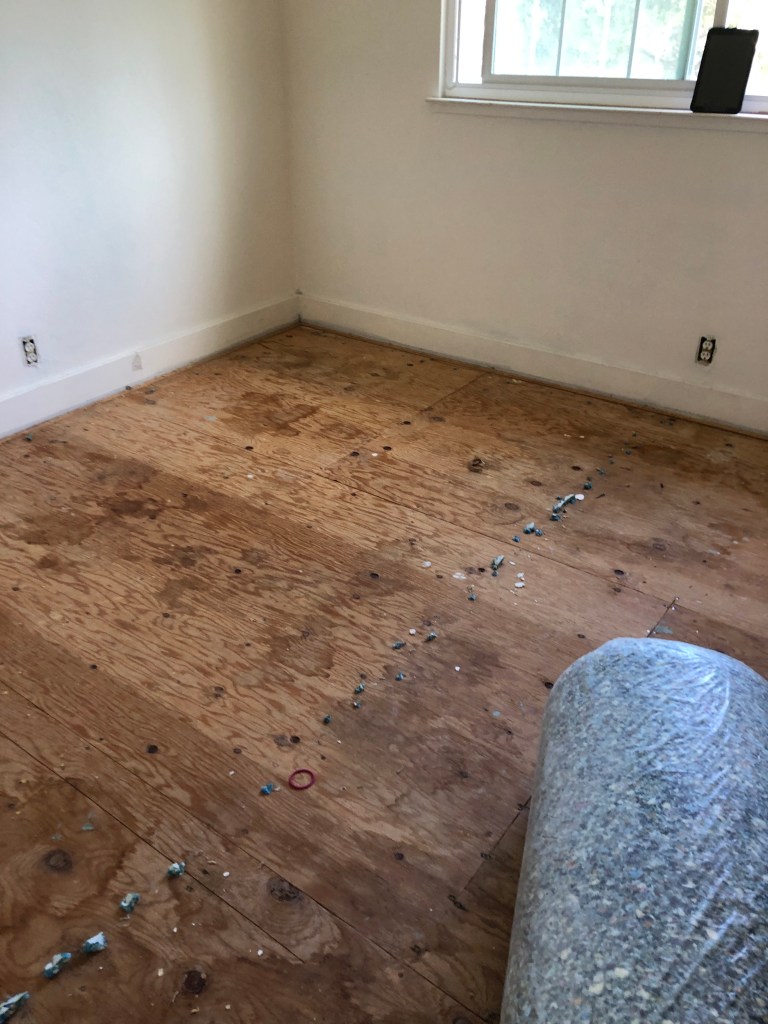
No surprise hardwood under the old upstairs carpet.Recycled Carpet PaddingPretty generic gray carpet!
Note: we installed carpet on the entire upstairs and down the main stairs so it was actually a pretty big job. The carpet installers were also dukeing out their territory with the stair railing guys so in the end they were not able to finish the stairs on the same day as the upstairs. This actually worked out really well though, because we had movers coming between the upstairs carpet install and the stair carpet install which means we didn’t have to worry about them dirtying up the stairs while they were lugging up furniture.
We had two quick tile jobs to knock out– ADU Kitchenette and the main kitchen.
I was ready with a bunch more cheap white Home Depot subway tile… but hubs said we needed to mix it up a little. It’s much harder to pick tile when you don’t just go with cheap white subway tile! I finally decided one some gray ceramic tiles. The ADU kitchenette tile was from Floor and Decor. Pretty cheap, easy to install, no special edging needed.
I purchased from Wayfair because it was much cheaper, but I had some much left over, I probably would have been better just ordering from Home Depot so I could easily return the remaining tile. I was nervous because this was special ordered and took a few weeks to arrive. I needed to have more than enough on site because it would take a long time to get more. The gray tiles have a crack glaze. It adds a cool vintage feel, but does require a tile sealant prior to grouting. (We did a quick sealant spray the night after install, but I’m actually not sure it would have mattered that much. We only let it dry about 12-18 hours before he started grouting and I haven’t noticed any issues with the crackle glaze. )
couldn’t put my fireclay farmhouse sink together again. So close, things are finally looking like a real house, cleaned up and ready to go. Faucets are in, appliances are in, outlets are in… and I JUST happen to notice a small crack in the fireclay farm house sink we installed a couple weeks ago.
It has barely been used because the faucet was just installed a few days ago. The sink itself is <$400 so I would just say, get a new one and “pop it in”.
But no, when deciding to put in an apron front farmhouse sink, I failed to understand the finality of it. I have been told that we cannot replace the sink, without replacing the whole cabinet AND countertop. Please just shoot me now. I am so done with this project.
It’s tricky because all the people involved play the blame game… who’s fault is this?
cabinet installer, the plywood support might not be high enough to provide adequate support?)
countertop installers, they actually set the sink into the cabinet and glued the countertop over the top
plumber or electrician, they were both tinkering with the undersink area in the last few days
At this point I don’t really care who’s fault it is, I just want someone to tell me that I can fix it without redoing the whole kitchen.
I ALMOST bought a KOHLER cast iron sink (in fact I ordered and returned TWO that were the wrong size before finally deciding to just go with this Houzzer fireclay sink from Home Depot because it was nice and deep and had good reviews and I could save myself $500). Can’t help but regret that decision. Surely the cast iron sink wouldn’t have cracked.
Update: Houzzer expressed apologies and sent a replacement sink. That sink is in my garage. I was too sick of contractors to deal with another project amid the pandemic so I let it go. A fancy ceramic repair man confirmed that the crack is irreparable, but that someone might be able to slide in the new sink if they are up for a challenge and some cabinet rework. If it ever leaks I will start calling around, but for now it is just cosmetic.
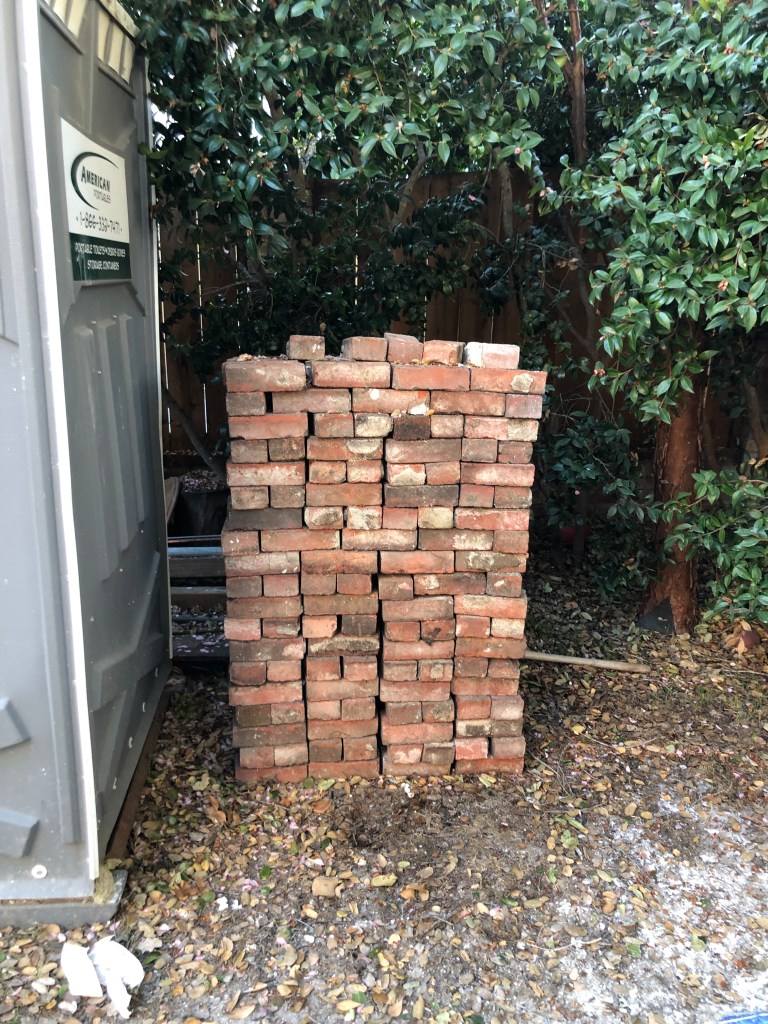
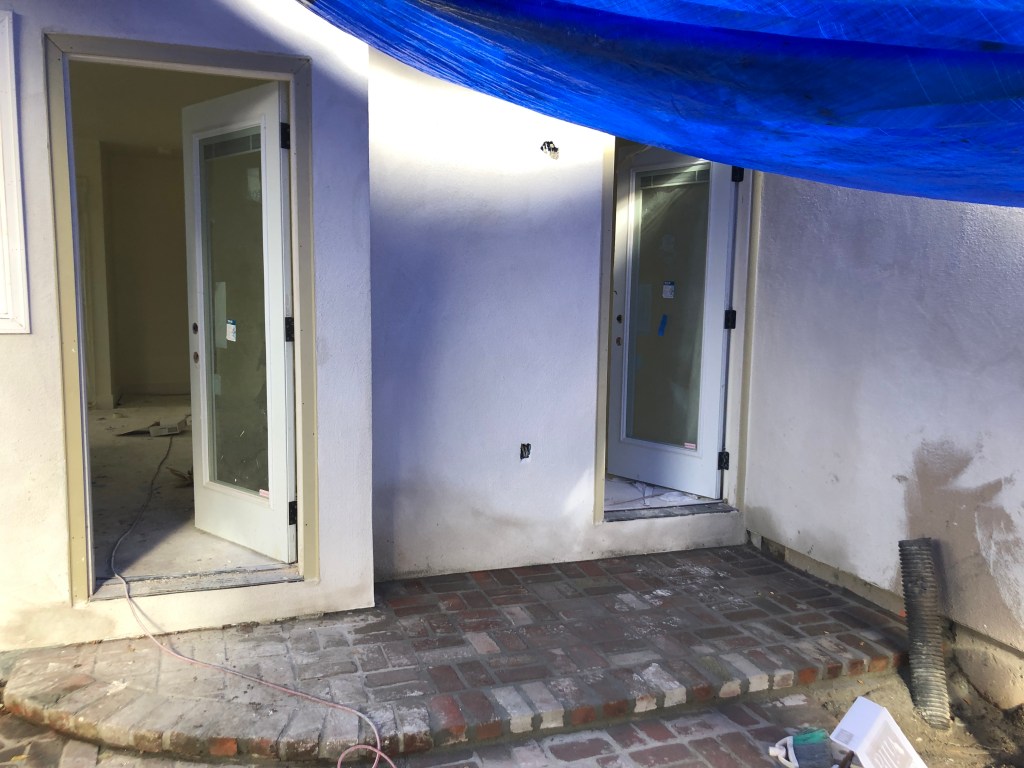
We needed to redo the brick step in the back of the house because of the new mudroom door. I trolled craigslist and found some old bricks to use that matched our existing old brick patio a little better than brand new bricks. This was one of the only things that actually went pretty smoothly and was completed in like 2 days. I really like how they were able to keep the left half of the step and retain that bit of curve to match the rest of the patio.
We are so close to being done (although we’ve been saying this for about a month now…) and in the last week or two before we are set to schedule final inspection… we get hit with the “shelter in place” order. We had been following the news obsessively and knew this was coming. We also had been taking as many precautions as possible the weeks leading up to the order as far as wiping down the house every time a contractor came through and trying to stay out of the house while they were working.
As far as we can tell, the order still allows for residential construction, we contractor has electrician, plumber and finish guy still working. Inspectors are all a little unsure about how much they will be working though so we are hoping we don’t get held up from officially moving in because of a shut-down when everything else is working and ready to go!
Almost the entire house was getting a little refresh with the project. Except the kitchen. So at the last minute the contractor said he would help us install new cabinets/countertops in the same configuration as existing.
We got the cabinets super cheap (<$10K for main kitchen, kitchenette, laundry and bathroom cabinets) from NGY Stone and Cabinets. They look nice enough, basic shaker style, soft close as all that. I am not sure the quality will be as good as IKEA, but they were cheaper than IKEA, delivered within a week after ordering–and were already assembled.
Countertops were a little trickier.
For one thing, we have a garden window that sticks out about 13 inches beyond the wall in front of our sink. This means we need a wider piece of material (regular countertops about about 25.5 inches deep (with the 1.5 inch overhang).
We had already decided we needed Paperstone countertops in the JADU/guest room kitchenette because we needed the green building recycled content credit. I got a quote from Scan-Top to do the whole kitchen in Paperstone as well, it was over $10K (about $2.5K for just the guest room)! I was not expecting countertops to be that expensive, especially relative to the cabinets. I was also a little nervous about Paperstone in our main kitchen, it takes a little bit of gentle care and I am not sure I see my kids wiping up every water spill. So I started looking into other materials just to see what my options were.
I had never purchased or really looked into any kind of counter materials other than the recycled options. After doing a lot of googling I learned more about the traditional options (natural stone vrs quartz). As a bit of a germ-a-phobe, the stuff I was reading about the porosity of marble and granite kinda creeped me out and I decided that I definitely wanted a non-porous material.
Scan-top mainly only deals in quartz, which is a great material (non-porous!), but I didn’t like how the colors were all so sparkly. I really had my heart set on a matte black countertop and they didn’t have any options.
I checked back in with NGY, their countertops were cheap and “pre-fabricated” (they already had a bull-nose and were ready to install). The closest they had to what I liked was a dark grey, but I just thought it looked a little cheap. Their countertops were meant for standard install and it was more of hassle to find larger pieces to fit the garden window situations.
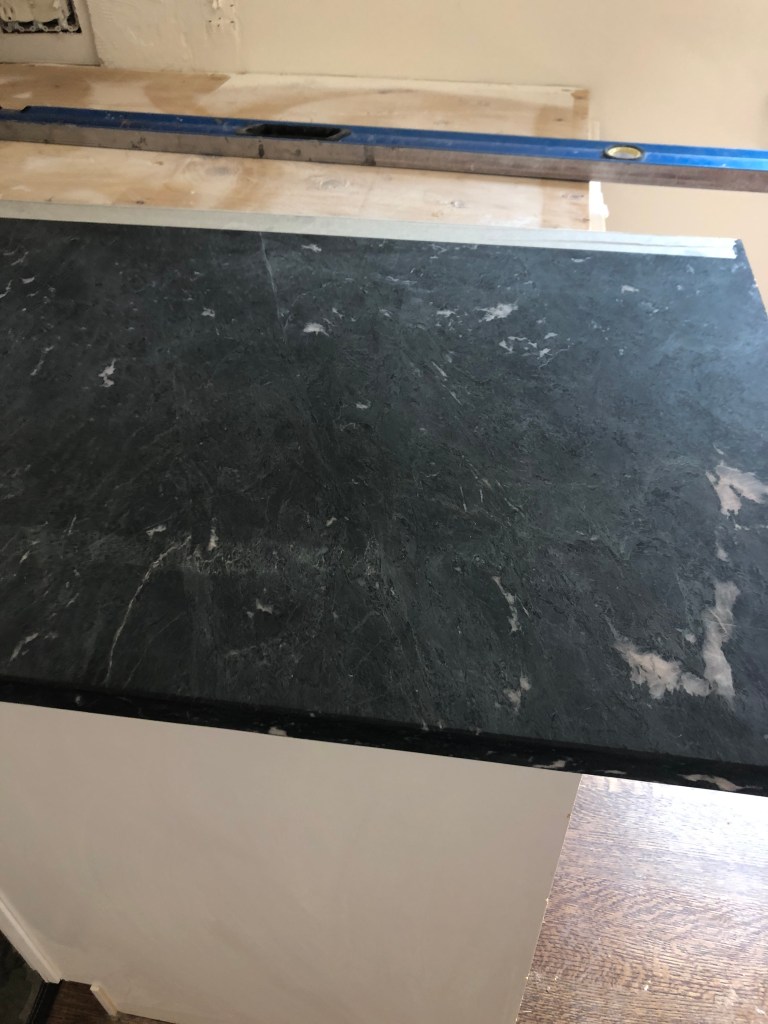
I stopped by good old Home Depot just to see what they had… low and behold one option was Soapstone! Soapstone is a natural stone, but it is naturally non-porous! It was historically used for kitchen countertops and lab benches in research and hospitals because of this property! So that is a triple-win for me: it is a traditional material (for my traditionally inspired design), it is a black matte material, AND it is more sanitary than other natural stones! I became weirdly super excited about this material.
One hiccup with the Soapstone. They only had 3cm tall material available. With 3 cm material, you usually just put the slab on top of the cabinets without a plywood sublayer and no bullnose fabrication. BUT, our previous (1 inch?) counter had plywood underlay and for some reason the new cabinets were not matching up with the height of this aforementioned garden window. It was a little bit of a headache trying to figure out what to do. Options are:
just put the soapstone on the cabinets where they are now and have a little “step-up” to the garden window, sort of like this
add thick plywood to even it all out and add a bull nose the counter edge to cover the plywood (this would be a really, really thick looking counter!)
add thick plywood to even it all out and add some sort of wood trim to cover the plywood without a bull nose (might look a little funny, but hopefully the overhand sort of distracts from the trim anyway…)
We opted for option 3. This does make our countertops on the tall end of normal, but I guess it works!
The pros of working with HomeDepot: cheap. They charge by the square foot instead of making you purchase a whole slab like basically any other dealer would make you do. This was great for us because our project put us just over one slab. Bonus for me–there was some sort of sale when I placed my order and I got additional discounts!
The cons… delays, delays, delays! We placed the order with home depot. Then they had to schedule someone from the fabrication subcontractor to come out a prepare a template (that took a week). Then we had to drive out to the stone slab warehouse and pick out the actual stone slab (you have to sign off on the exact slab for natural stone products since they vary). Then they were supposed to send us a seam diagram within 48 hours, but it took a WEEK. After approving the seam diagram we had to wait for the warehouse to ship the material to the fabricator (another week, minimum). Once the fabricator received the material we finally got to schedule the actual install. So it was over a month from paying with my credit card at home depot, to getting the countertop in my kitchen. Definitely a few thousand dollars cheaper though, so… I guess it was still worth it? Honestly I didn’t get any other exact comparison estimates though so hard to say. If I had more time I would have tried to compare apples to apples.
So as we get close to the end, I am trying to make sure I have everything I need on-site or on-order. I have a newish whirlpool dryer that I was planning to use and need to order a new front loading washing machine to match. I noticed that there were two sizes (capacities) of this type of washer and went over to measure the space in the mudroom to see if I could get the biggest one. The existing dryer is 31.5 inches deep. The space in the room from the back of the wall to the very edge of the doorway (past the trim) is… 32.5 inches. You need minimum of 4 inches behind the dryer for the venting.
UUUUUUUUUUUUUGGGGGGGGGGGGGGGGGGHHHHHHHHHHHHHHHH.
So basically it doesn’t fit. If I install the dryer that I have (and have had since the architect supposedly measured it), I will not be able to open the mudroom door because it will stick out 3 inches past the door jamb. I looked back at the plans and realized that the architect did not leave room for the venting in the back of the dryer. He also must have used a smaller size for his default place holder because there is no way we have that much room.
I discussed with the contractor and possible solutions are:
Order a new W/D set (there are a couple of cheap top load washers with normal-ish capacity that are about 28 inches deep) that should fit.
Stack the washer and dryer further away from the door
See if the HVAC guy can somehow make a space inside the wall to reduce the space need for the duct.
Install a barn door instead of a swinging door and just let the dryer hand out there in the door way.
I am going to explore option 3. At least we have options I guess, but pretty annoying that these little measurement errors can cause big limitations down the road!!
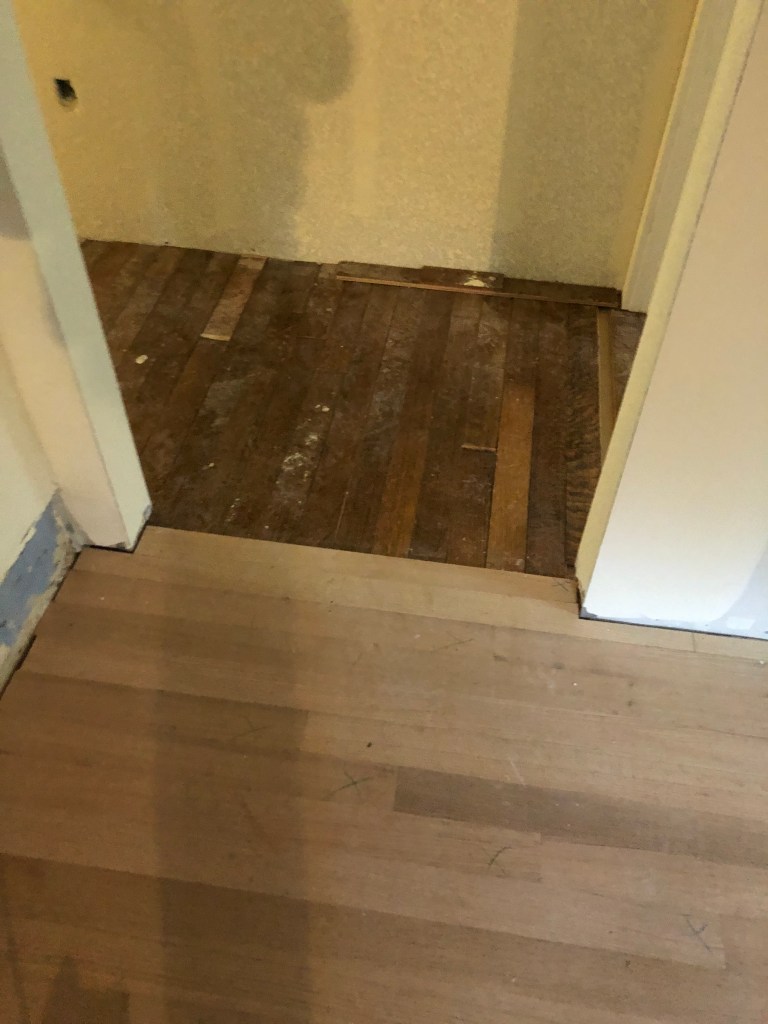
We started with a mix of 90 year old 2 inch top-nailed oak floors in the living room, cheap fir wood floors (probably subfloor?) in the downstairs bedroom, and 1990s quartersawn oak floors in the kitchen and family room. The goal was to tie it all together and match the newest floors. I love that hardwood floors last forever–like 100 years! Hardwood can be sanded and stained to give a new look as trends change. BUT, wow do they take a long time to put in compared to those fast laminate floors!
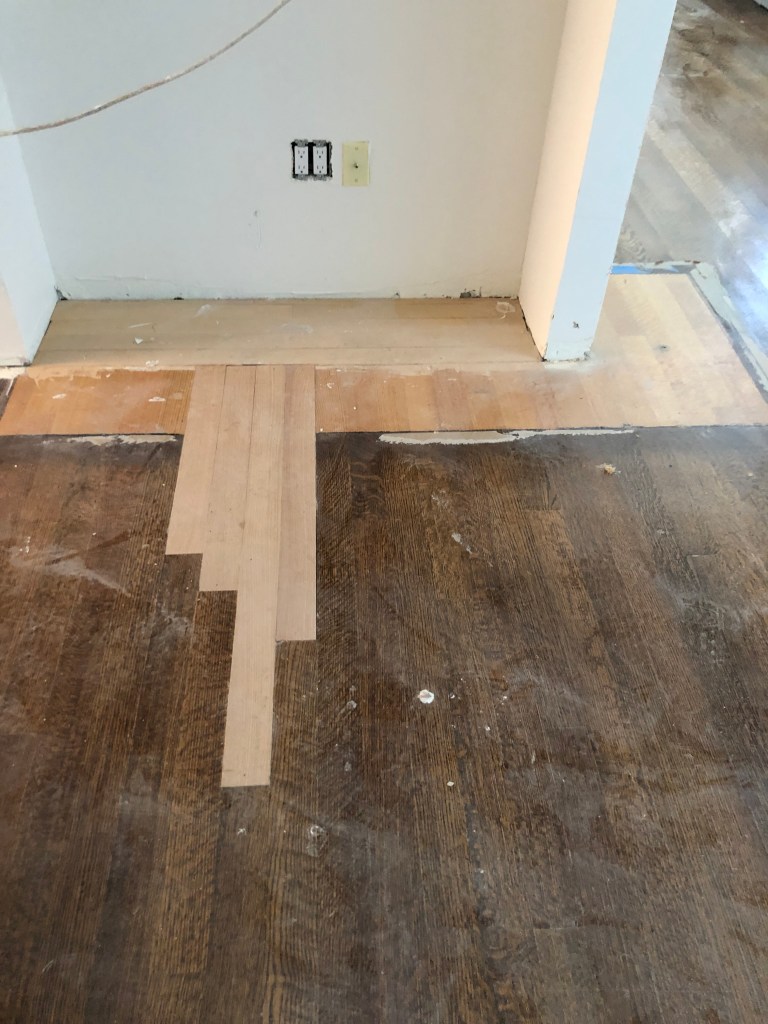
Of course nothing is simple. Once we demoed we found out that the newest floors were only 1/2 inch thick and now most quartersawn oak hardwood floors are 3/4 inch thick. This meant we had to install a little ramped transition from the 90s floors to the new rooms.
Not ideal, but not so bad. We also had a few wonky areas that were uncovered with demo. The laundry closet (that will no longer be a laundry closet) previously had linoleum, removing the built in bookshelf left a small rectangle of subfloor exposed, and a dead return air vent was now sitting in the middle of the walking path.
Our floor guys did a great job patching it up! We had just about enough old wood floor from demoing the mudroom to patch up the parts that needed the 1/2 inch floors. Then he was able to shave down a few new board as needed. It’s really pretty amazing what they can do with hardwood.
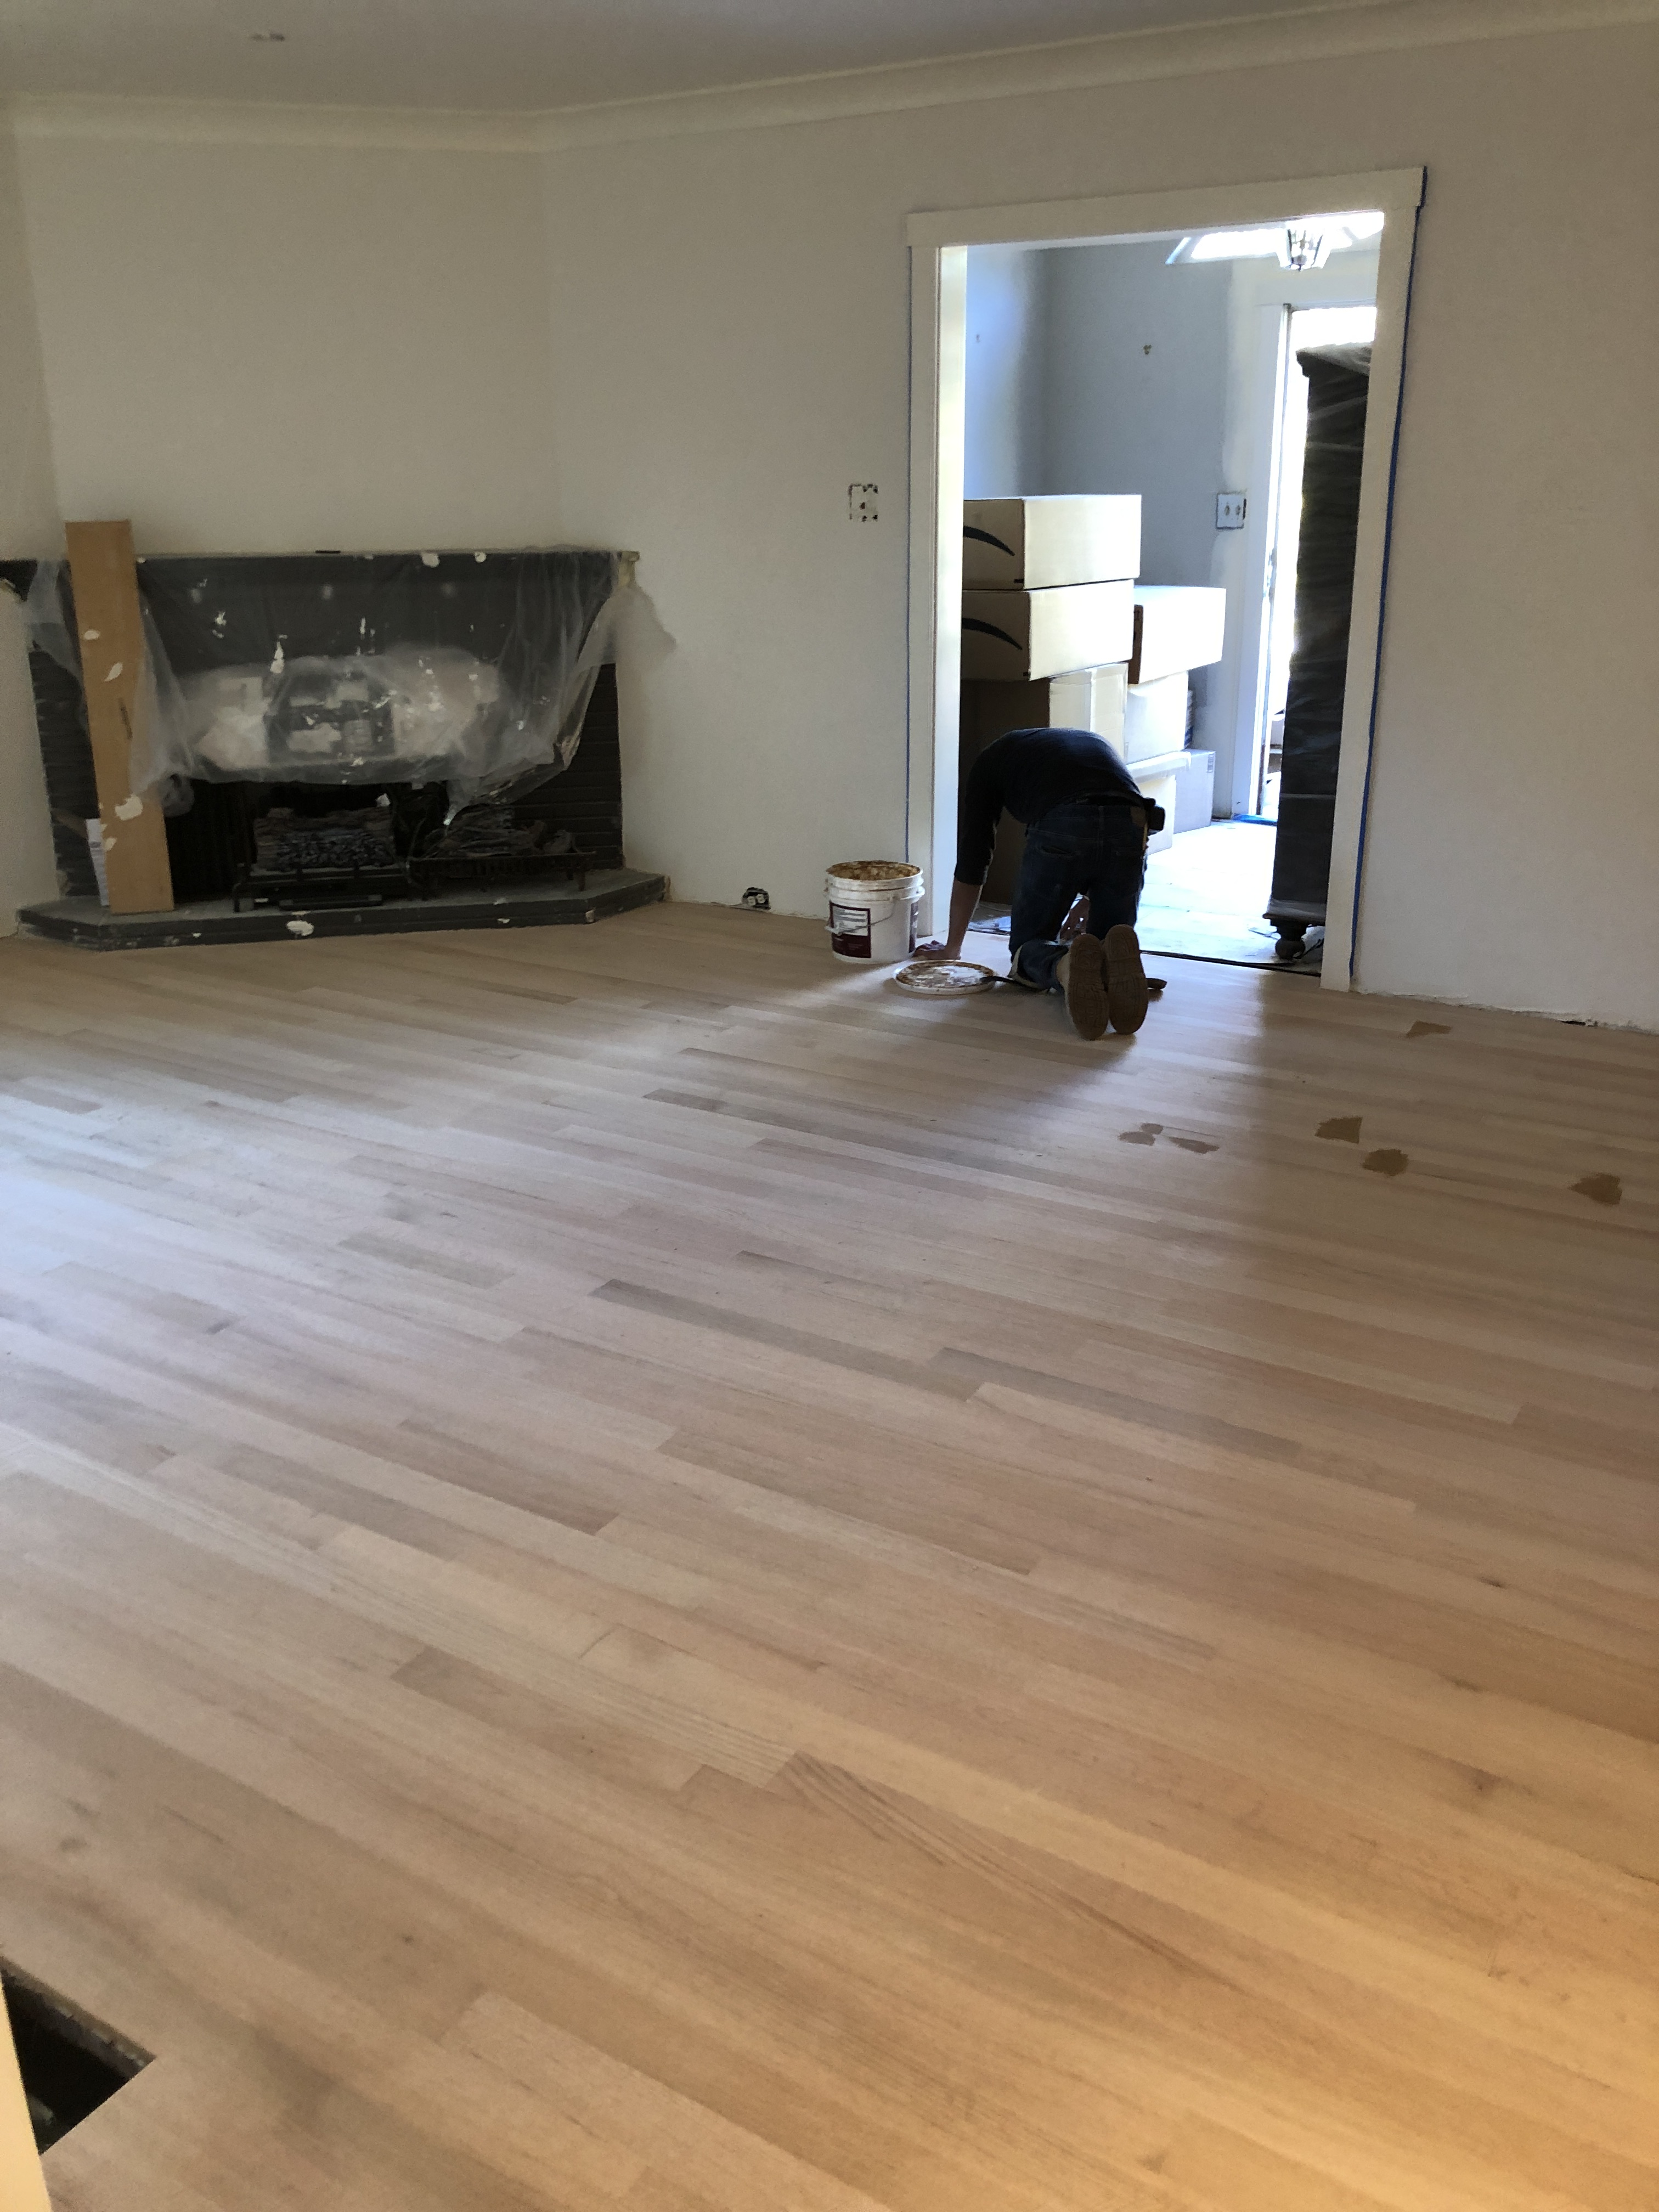
Laying the actual new wood floors in the living room and bedroom only took a couple days, patching took a couple of days. Then the floors have to “acclimate” for a few weeks before finishing them. After the acclimation period, they sand it all down.
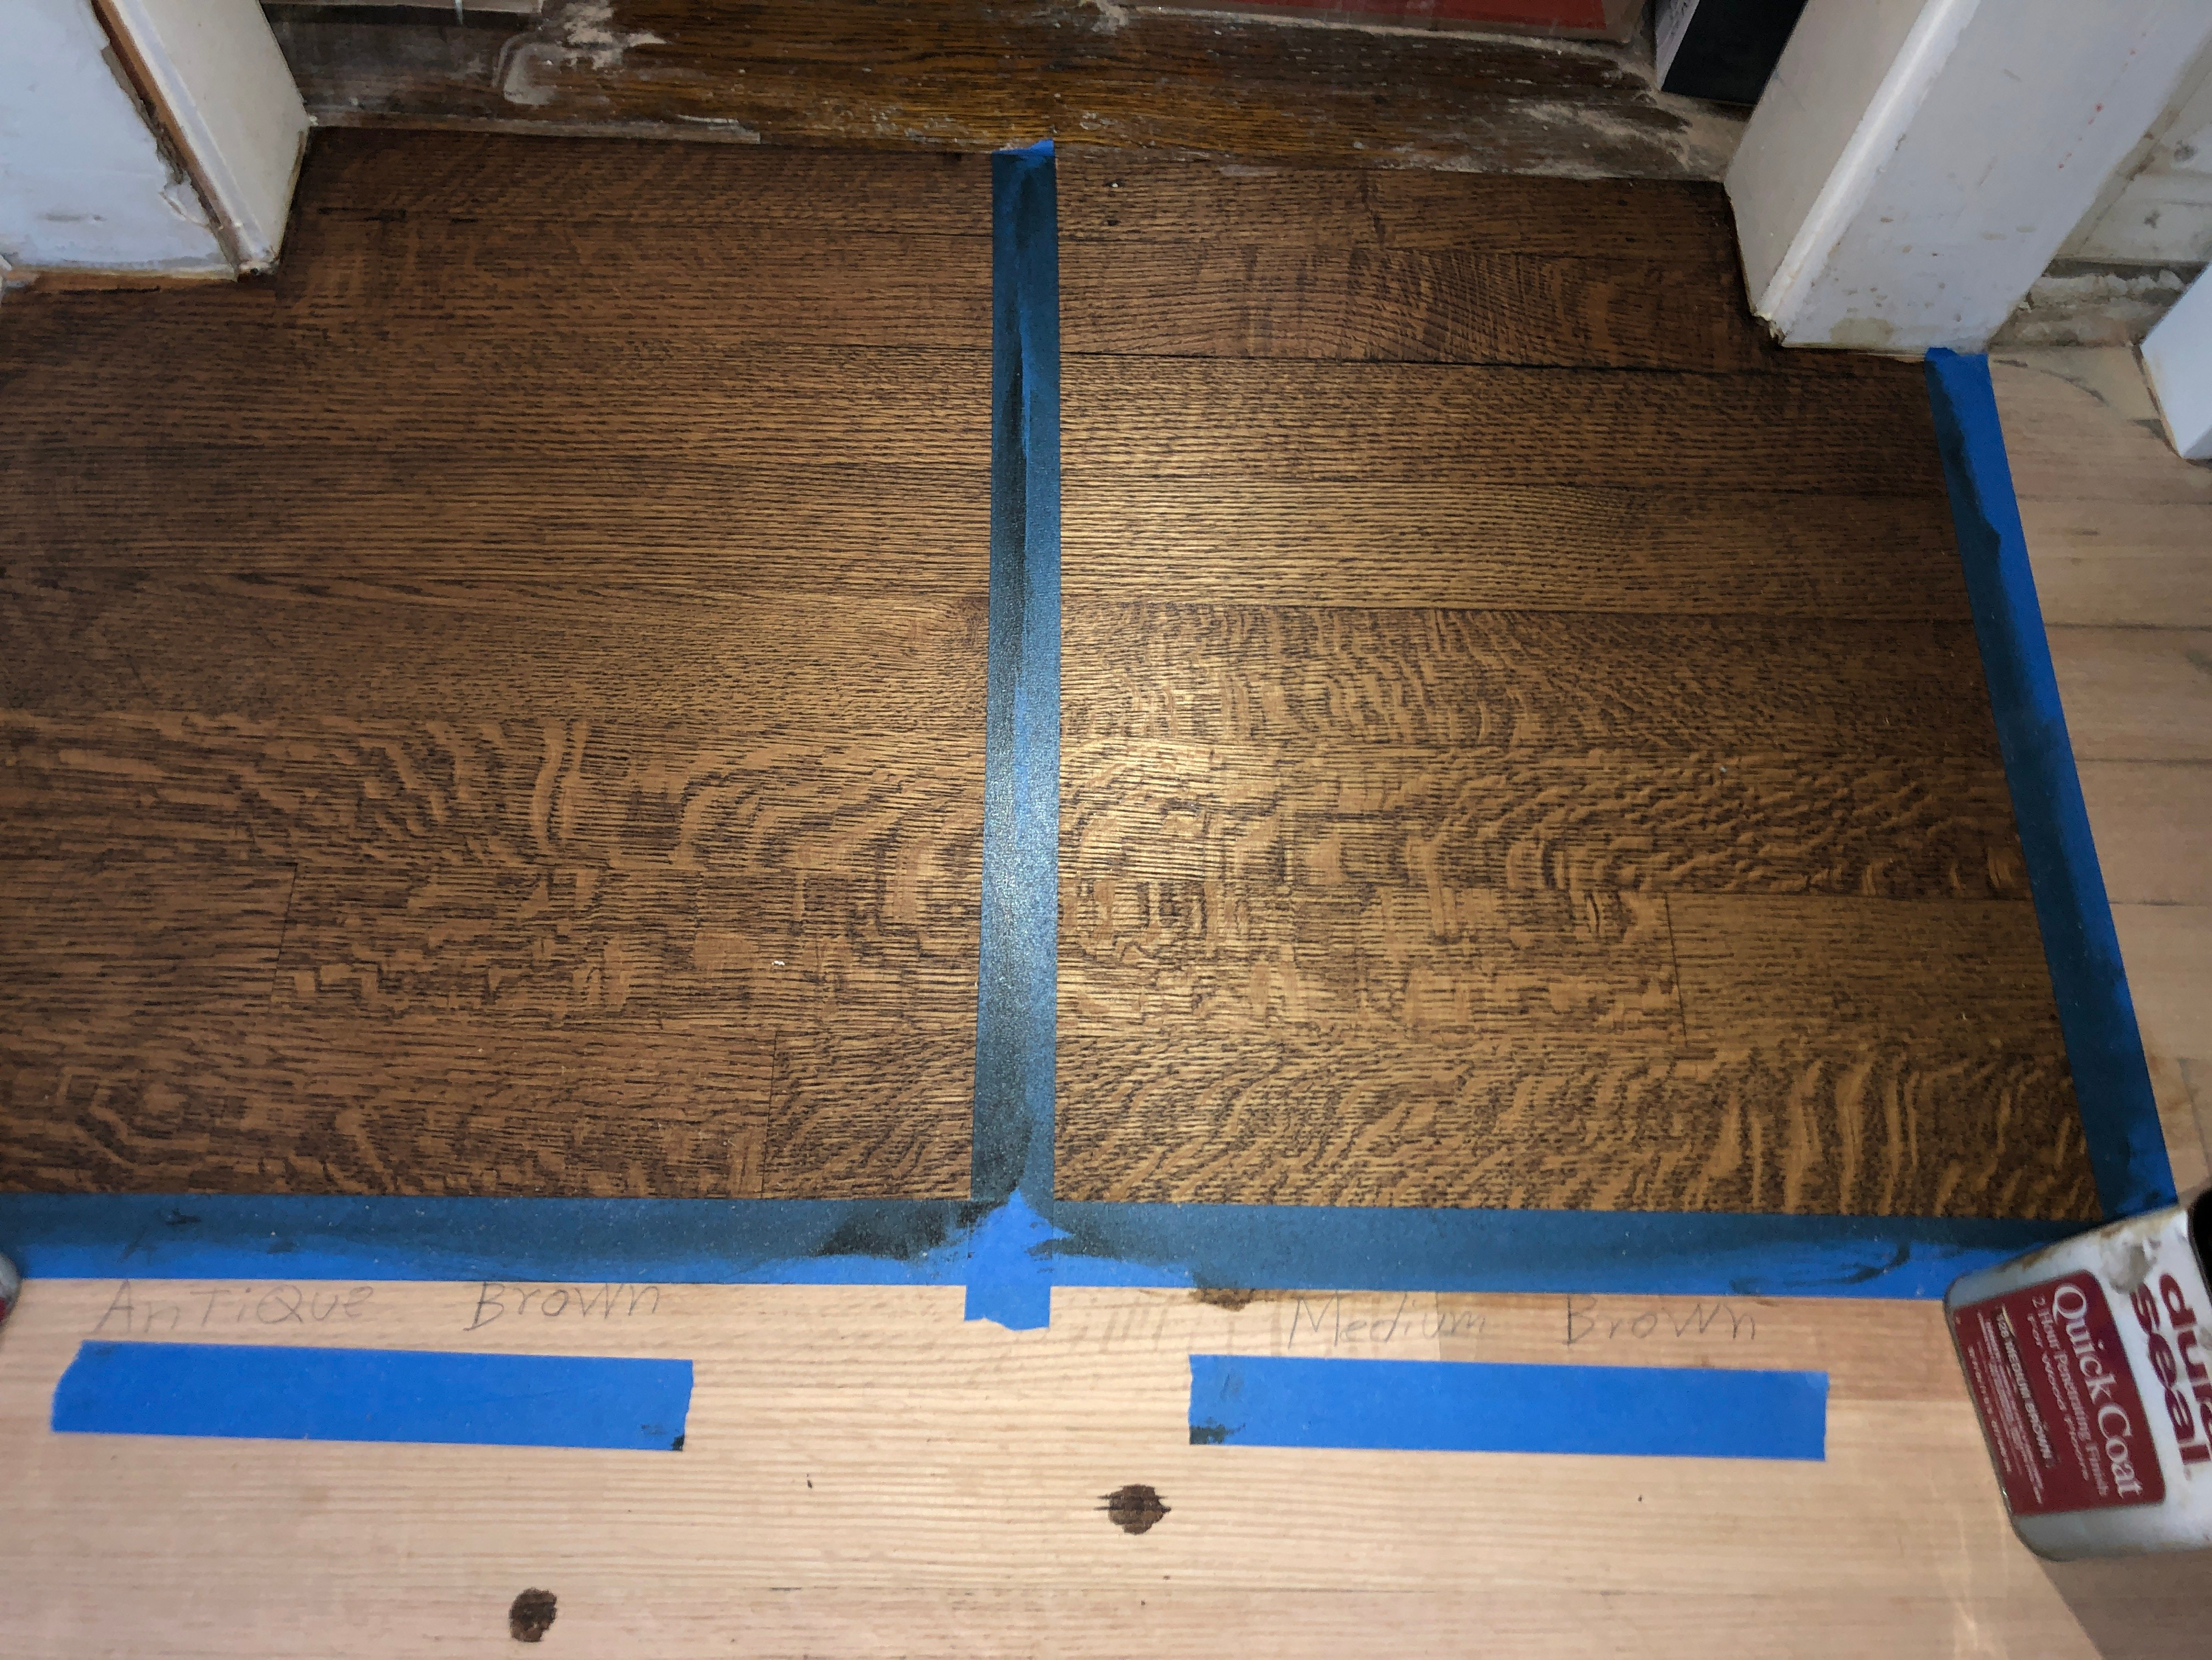
Then comes the stain. I liked the color we had before. I think it was “Antique Brown”. He did some test squares for me comparing Antique Brown with Medium Brown. For the life of me, I cannot tell the difference. He thought Medium Brown matched our old dining room floors best so we went with that!
Finally 3 (THREE!) coats of polyurethane to seal the deal.
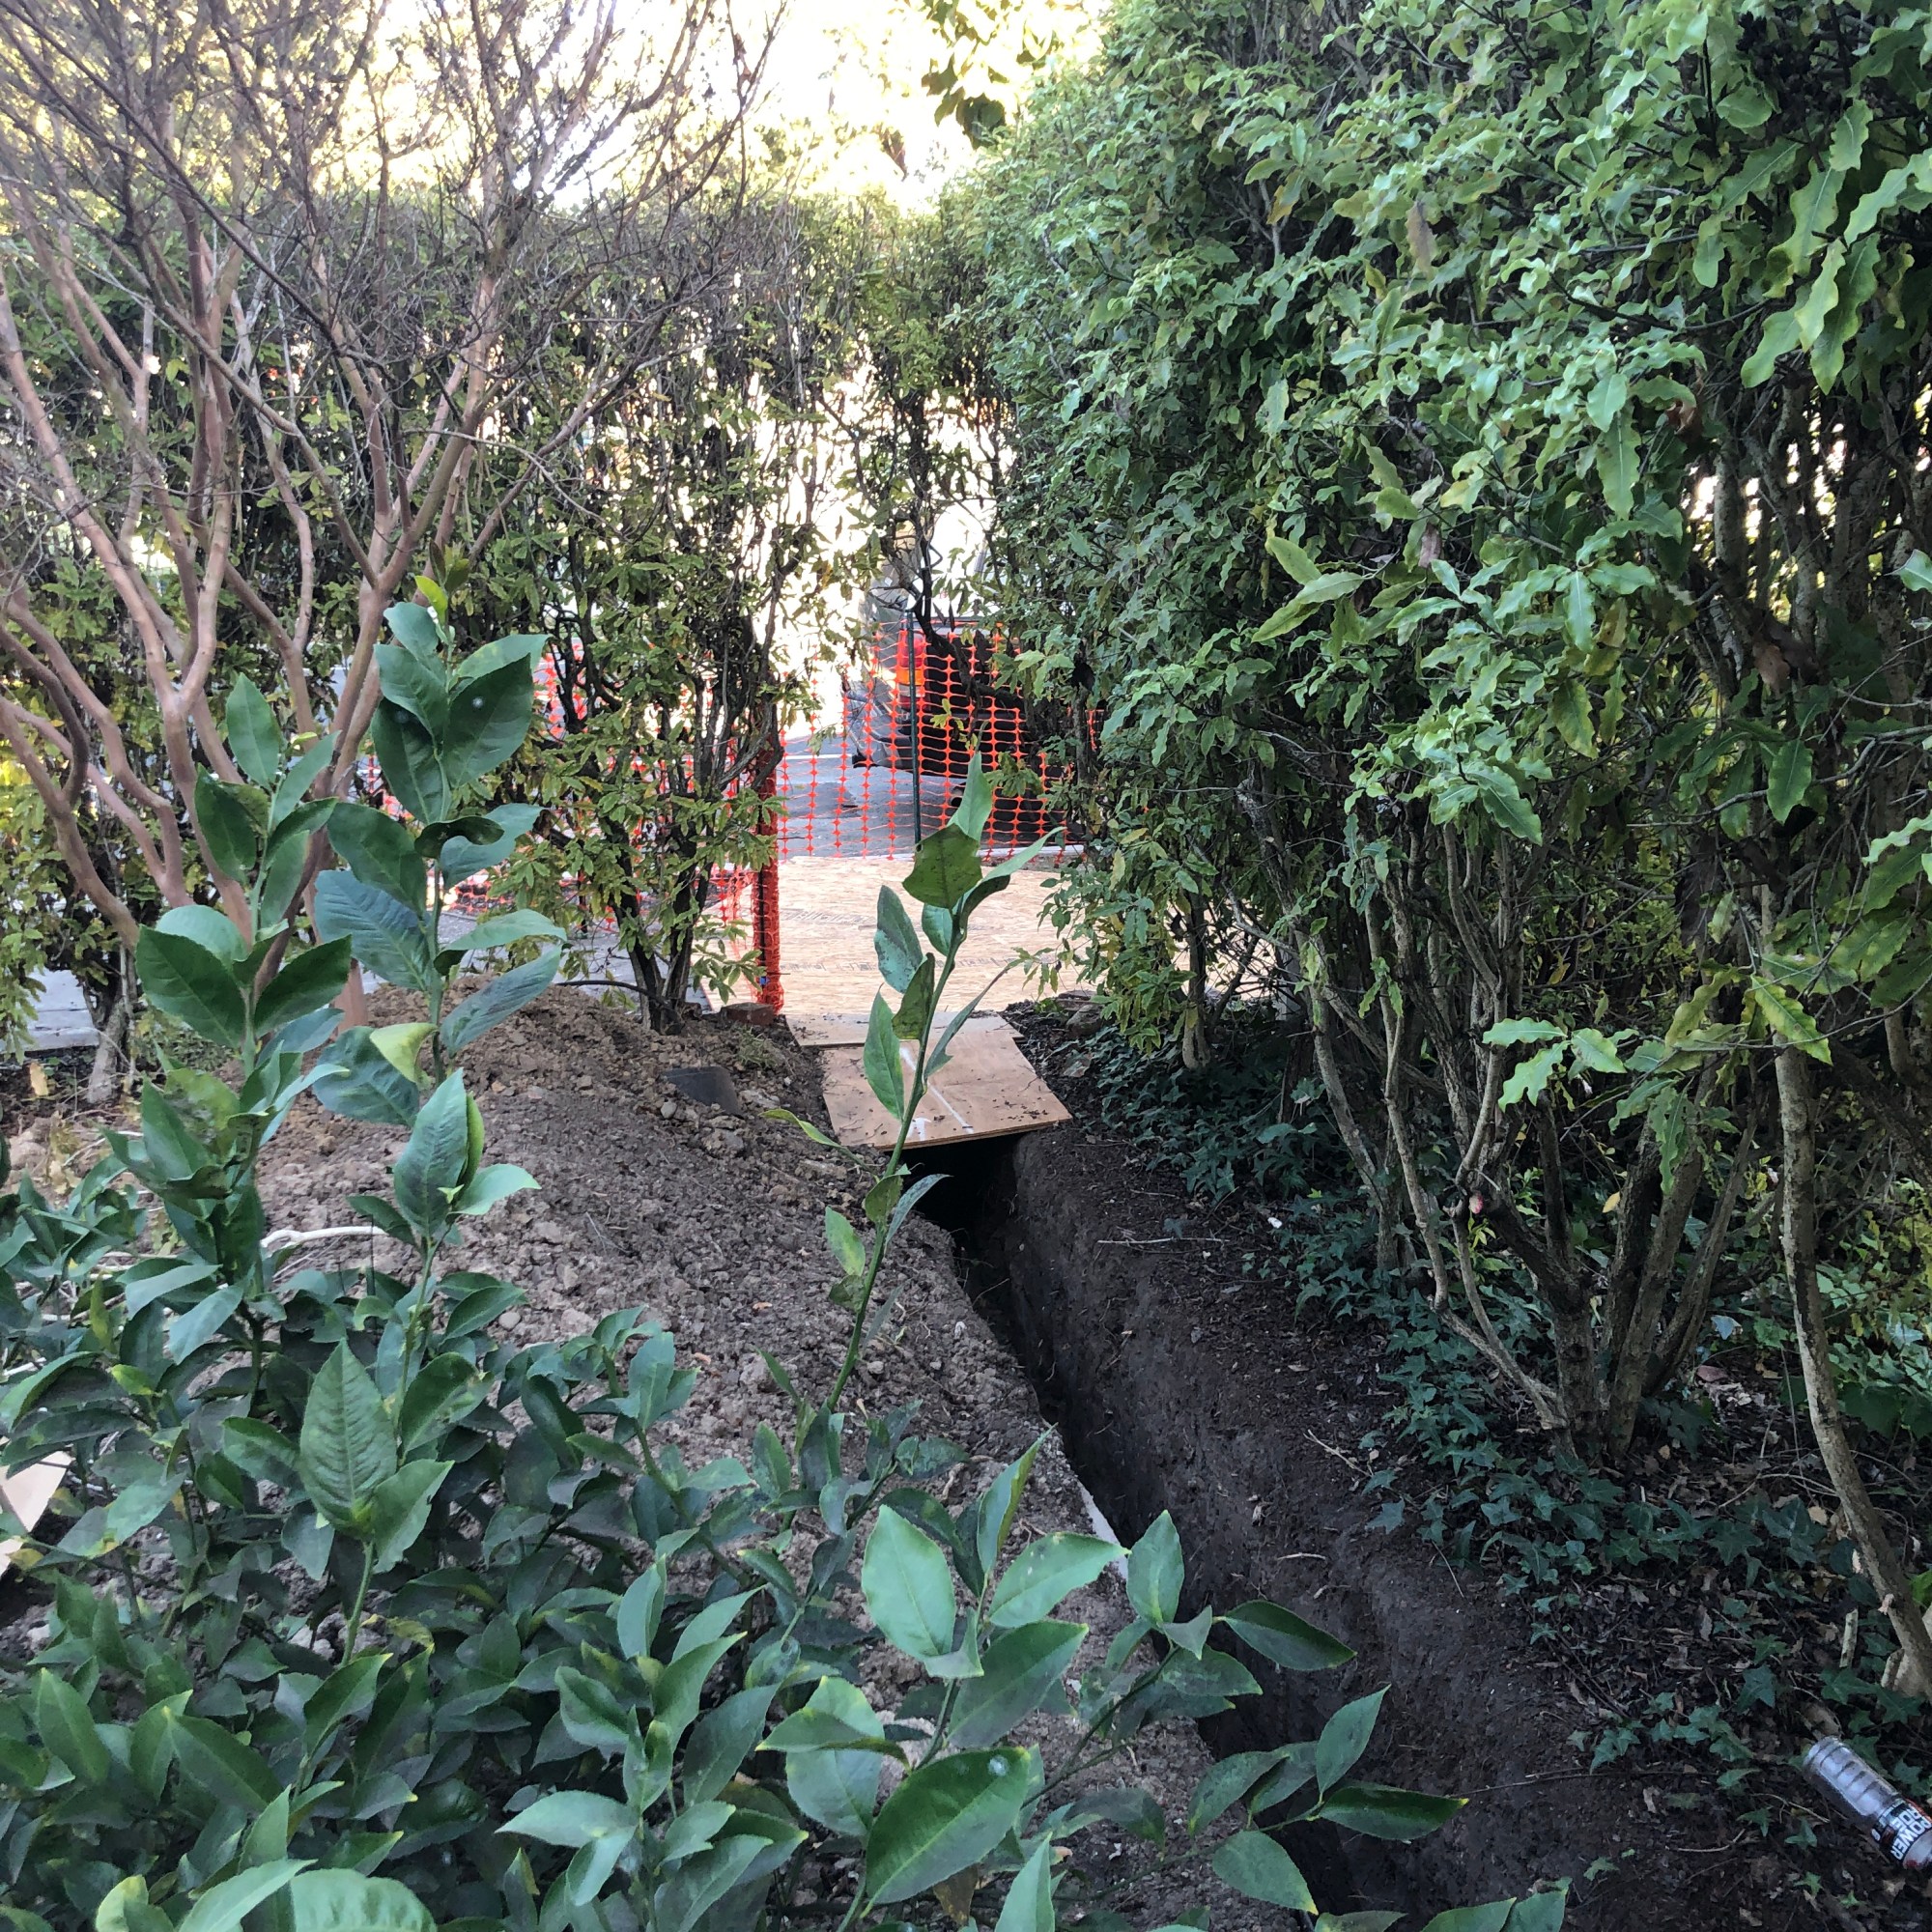
I mentioned utilities upgrades here. In order to install the electric service upgrade, we had to dig a giant trench through the yard AND tear up the sidewalk. The tear up the sidewalk we had to get a permit from public works. To get the permit you need the approved electric service application (which SHOULD have a sketched plan showing exactly where to cut the trench to reach the connection point–ours didn’t have this so we had to go back and request it after the fact) and a copy of your contractor’s liability insurance.
My what a mess.
Generally, as I understood it, the process should go like this and means you only lose 1 day of power:
Dig the trench per the plan/specs.
Schedule an inspection date with the electric inspector and the building inspector on the same day.
Call for the existing power to be shut off the morning of that inspection date.
After power is shut-off, lay the conduit pipe and install the new panel scaffold.
Backfill the trench (*don’t forget to add a red caution tape that says “Electric” or something like that–this is a new requirements to increase safety for people digging in the yard)
Proceed with the scheduled inspection with building and electric. (There is some test the electric inspector does…but hopefully they both approve and you are good.)
Pull the electric line from the street sidewalk opening to the panel and connect to the panel.
Call for electric to re-connect power.
NOTE: This reconnect is still considered “conditional”. I had to sign a paper that says I will not occupy the building until the conditional power is lifted (i.e. the permit is closed).
COMPLICATIONS…
Utilities have proven difficult because we are dealing with too many people (building/public works/utilities/electrician/contractor) that seem to interpret the rules or procedure differently!
First Problem: The electrical inspector came by to inspect the trench and said things looked great, ready to go. But we also need approval from the building inspector… come to find out… even though we had applied and were approved for the electrical upgrade (125 AMP to 200 AMP) somehow we forget to include that on the building plans (blame the architect?). So… I had to go to the building department and submit a revision. They let me fill out the “Simple load calculation sheet” to show that when all appliances and lights etc are installed the service is sufficient for our needs. Then we red-lined the plans over the counter to mark the existing electric panel with a service upgrade. This was a stressful last minute change (didn’t want to delay anything else in the last few weeks), but luckily the folks at the building department were helpful and understanding!
Second Problem: The contractor was planning to just lay the conduit pipe and then backfill the trench before inspection, but the building inspector told him he had to have all the fuses installed in the panel first. When the electric inspector came the next day to turn the power back on he said they weren’t supposed to do that yet–they have to take the line out, do some test, and re-pull it. Groan.
Third Problem: Scheduling delays. I gave up trying to figure out what my contractor was doing. By the time he had the proper inspections and finally got power turned back on… we were NINE days without power. Luckily my amazing neighbor let us use her electricity by means of extension cord so that guys could continue work on the house (sawing trim, paint sprayers, nail guns…).
We have to upgrade our utilities (electric and gas) for this project. The process started during the building plan review process when we had to fill out this form. The form then had to be stamped approved by both gas and electric utilities people at the city. So we ended up with TWO copies of the form, one stamped by gas and one by electric. After approval they send you a bill and you have around 90 days to pay the bill to initiate the actual service upgrade.
The funny thing is, to upgrade gas it costs over $8000, but all you have to do is get your gas meter pipe stub in the right place for the meter hook-up on the side of the house — the city does the rest. Electric service only costs about $850, but the home owner (or contractor) has to dig a 36 inch deep trench and lay the pipe all the way through the yard AND sidewalk to the service location on the planting strip next to the street!!
We had to move the gas meter location about 15 feet because the new basement egress window cut into the old line location. We were told by the gas utilities folks that you have to get on the schedule early because there is an 8-12 week wait list for service install. I harped on my contractor every couple weeks throughout the fall to get this worked out. Of course he didn’t. Come late December, I check in with the Gas guy from the city. He says, no, we are not on the waitlist and that we still have some work to do before he can put us on the list.
Now I started freaking out. The contractor didn’t have the gas meter stub out out in the right location! It was a last minute change on the plans and I think the plumber didn’t get the message or something. Whatever. Quick fix was, throw the pipe on the side of the house to the new location. So this is what we have.
SUPER ugly. Seems silly that we just did a whole remodel and they weren’t able to hide the gas pipe in the crawl space, but at this point we are just trying to stay on schedule so I guess we paint it house color and plant something in front of it!
Eventually after the building inspector approved the gas stub out (they perform some kind of pressure test) the city came out and stuck the gas line in the trench next to the electric pipe. Then we could backfill everything and close up the sidewalk. This was just the gas LINE though. There is still another step to get gas FLOWING through the line and into the building and apparently we are still on the wait list for that…


